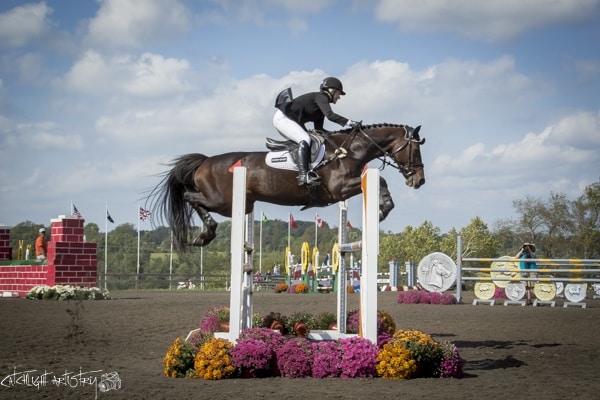
How to Become Your Own Horse Photographer: 7 Easy Tips
Taking great photos of horses is tough! After a long hot day spent at a horse show, many amateur photographers come home with a memory card full of blurry, poorly timed, and dull looking photos. We spoke with a professional horse photographer to find seven tips that will help you take amazing horse photos that will ‘Wow’ your friends.
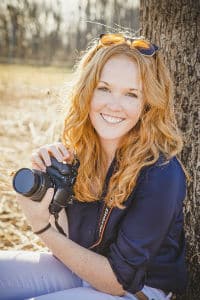
Amanda BraunFi started riding horses when she was eight years old and picked up her first 110 mm camera just one year later. Eventually she combined the two hobbies. “I found a love for taking photos, and the feeling of having a memory of a moment that might be otherwise forgettable, or lost over time.”
She specialized in capturing intimate and candid shots rather than the typical “girl on horse” photos of riders perched in the two-point position over jumps. She explained, “Since I had ridden for so many years, I felt like my eye was better tuned to capturing the atmosphere and bond of the horse and rider.” Today, Amanda is a professional horse photographer with a portfolio filled with stunning photos like what you will see here.
Here are Amanda’s seven tips on how to take better horse photographs:
1. Choose a Quality Camera With an Optical Zoom
The first thing you need to decide if you’d like to take great horse photos is what type of camera you are going to use. Most of us carry a smart phone with a camera in our pockets, but Amanda explained that this wouldn’t result in print-worthy photos. Instead, she said, “go for a ‘point and shoot’ that has an OPTICAL zoom that goes to at least 200mm.”
For even better photos, invest in a quality camera with exchangeable lenses. Choose a brand like Canon, Nikon, or Sony. “I am a Canon person because I think they have a wider array of higher quality gear, and suitable low-end gear.” Buy the body of the camera and appropriate lenses to match your type of photography.
Amanda uses a Canon 6d body and a 75-200 mm f/2.8 IS II L Series lens. She also recommends renting equipment from a company like Borrowlenses.com if you’re not prepared to make a purchase.
Choosing the correct equipment can be a challenge. This is a photo using a 6d body camera.
2. Make Sure You Have Appropriate Lighting
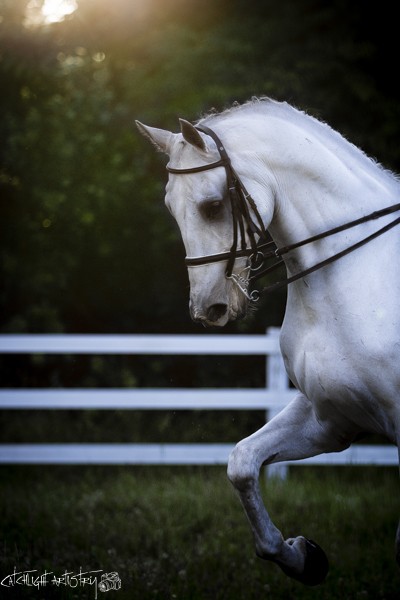
Some of the best photos can be taken in early morning after sunrise or in the golden hour when the sun is setting just above the horizon. If you’re shooting during the middle of the day, move to a position where the sun is behind you and directed at the horse. She added, “If the sun is straight overhead, still look at the angle that the shadows are and move yourself to be at the opposite angle.” It’s a good idea to take some practice shots so you can test the lighting.
This photo of Passap, an FEI horse trained by Lauren Kimmel, displays beautiful use of lighting.
Different color horses show up better in photographs. For instance, cameras often have trouble focusing on dark colored horses resulting in dark feature-less horses or an over-exposed background. It’s a good idea to shoot in “raw” or CR2 file format (if your camera has this capability) so that these issues can be fixed during editing. Amanda chuckled, “If everyone had a white horse, I would be happy!”
If you are going to be shooting in an indoor arena, make sure you have a camera with a high aperture (the part of the camera through which light enters). Stand in a corner of the arena if possible so you can get the best photos when natural light can illuminate the rider.
3. Consider the Composition of Your Photograph
Composition is the placement or arrangement of items within your photograph. Amanda explained that shooting from a crouched position is often best. “I try to keep the center of the body level to my lens. So if I am standing 200 feet from the horse, I need to lower my position. If I am standing 20 feet from the horse, I stand a bit taller. This fills the frame naturally with more depth of the horse and rider.”
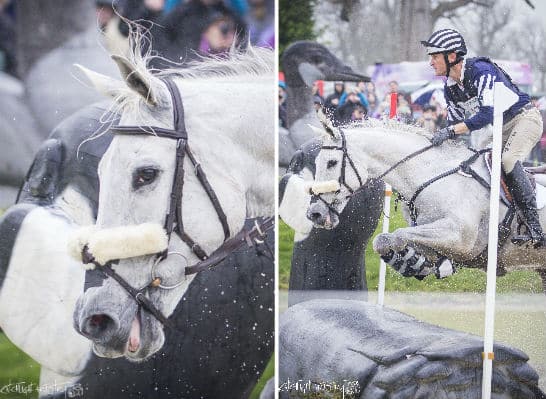
These photos illustrate the difference between shooting from a crouched position (left) and a standing position (right.)
“There is also a photography ‘rule of thirds’ that basically explains the scene can be cut into thirds up and down and side to side. Balancing the image within the thirds helps to tell the story.” For movement photos, take your photos from the front and at a slight angle so you can catch the horse’s chest and the rider’s face.
4. Be Sure to Time Your Photo Correctly to Capture Quick Moments
Timing your shot perfectly to capture a horse mid-air over a jump can be very tricky but gets easier with practice. Amanda explained, “I know my equipment and lag time very well, so it’s become easy.” For beginners, she recommends that you set your camera to sports mode and allow for continuous shooting. It also pays to buy a memory card that can record images very quickly and perform faster processing. She uses the Scandisk Extreme PLUS memory cards.
Until you master the timing on your specific camera, sports mode and a fast recording memory card can help you capture those quick moments in time.
5. Don’t Frighten the Horses
It’s important that you don’t distract the horse and rider while they are competing. Don’t get too close to the rail and quietly step back when the horse is coming close by. Always walk, never run. If you choose to shoot from a crouched position remember to slowly stand well in advance of the horse reaching you.
Amanda also recommends that you mute any beeping noises on your camera and NEVER use a flash for horse photography. “On-board camera flash that is built in will generally ruin any photo that had a chance of being decent. Plus, it can spook the horse or blind the rider.”
6. Learn About Editing to Get Professional Quality Photos
The final step to producing outstanding horse photos is to learn about little bit about photo editing. Lightroom from Adobe is an excellent program that is user friendly and quite economical. “It is very easy to correct images, or add a tone that you like to the image by simple sliders. You can also crop or align the photo, correct lenses distortions, clone, heal, or use the adjustment brush to fix blemishes or background.” It is even possible to purchase presets and brushes that allow you to edit your image with just one click.
Photoshop is another popular editing program but it’s a bit too robust and expensive for a hobbyist. If cost is an issue, consider free software called GIMP that can help with simple edits.
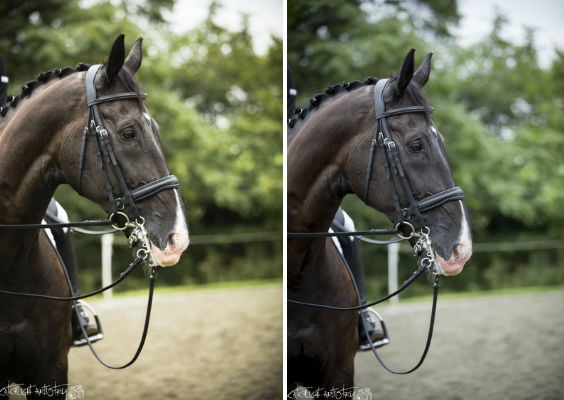
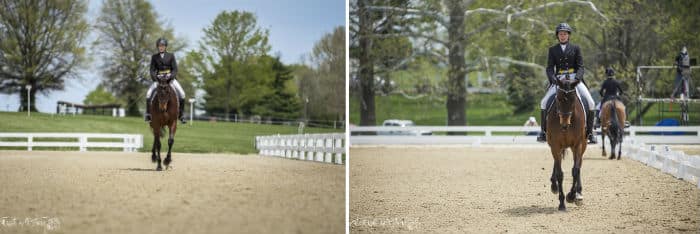
Editing can be used to provide either a warm tone (left) or a cool tone (right) to a photo.
During editing, crop the image to get rid of distracting elements like trashcans or stray people in your background. Soften some edges, add ‘burn’ to areas that the eye doesn’t need to focus on, and add sharpening to the horses. “I can even add a pop to the color of the horse, or remove stains on a gray with saturation levels.”
She finished, “Another very neat technique is to move the Highlight and Shadow sliders in Lightroom to allow the shadows to have a blue tone, and the highlights a slight yellow tone. This helps to create warmth and depth in naturally lit photos.”
7. Practice Smart Photography
Here are some best practices that Amanda uses so that can make the most of her time spent during a shoot.
- Take many more photos than you need. As Amanda says, “Thank goodness for digital!”
- Allow the horse and rider to focus on their riding and not be distracted by you.
- Carry a whip if you’re taking photos of a loose horse in a pasture as a safety precaution.
- Use horizontal mode if you do take photos with your phone to fit more into the frame.
- Use Pinterest and make a board that you can reference with ideas for your shoot.
Amanda loves her role as a professional horse photographer. “I always feel like I can feel the horse’s emotion and how they feel about life/the rider/the show, etc.” She especially enjoyed a photo shoot with FEI horse Passap, trained by Lauren Kimmel, calling the experience “magical.”
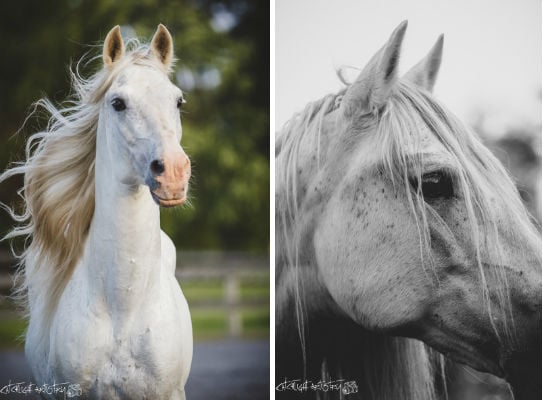
The Andalusian stallion Lucero was a particularly challenging subject for Amanda, but she was able to get some gorgeous shots.
Remember that horse photography can be challenging! Amanda once took photos of a gorgeous Andalusian stallion named Lucero who spent the entire session trying run her into the ground - camera and all! Luckily, the trainer was able to ward off the stallion and Amanda got some great shots. To learn more about Amanda’s work, check out her website.
Hopefully, with these tips, you’ll be well on your way to taking some fantastic horse photos of your own.
Questions:
What are some of the challenges you’ve encountered when trying to take horse photos?
What is your favorite type of camera to use?

